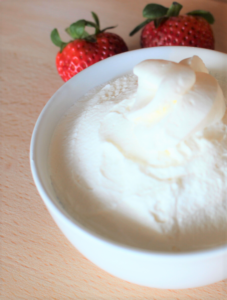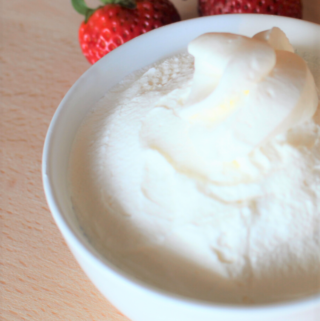
This easy homemade whipped cream is the best healthy cool whip alternative. Only way better
How to make easy homemade whipped cream (a healthy cool whip alternative)
If you’re wanting to avoid all those hydrogenated oils and fake stuff in the store-bought versions, this is your dream cream. And homemade whipped cream just plain tastes amazing. Way better than any old store-bought cool whip anyway.
Have you ever made your own homemade whipped cream? I’m excited for you to try this! It’ super simple, quick, and easy. In less than 5 minutes you will have the best homemade whipped cream ever. And you just can’t beat the real thing baby!
Ways to use easy homemade whipped cream
- In your morning coffee for a quick and easy Cappuccino – like this Chai spiced coffee has
- Add to your favorite fruit for a healthy easy snack or dessert
- Use as a light and easy frosting for cakes – or try the whipped cream frosting recipe
- Top your waffles or pancakes with it – like these gluten-free blueberry pancakes
- Mix it with fruit for a healthy easy fruit salad
- Whisk in flavors of your choice (vanilla, fruit, cocoa, nuts, maple syrup, etc) and freeze for a healthy easy ice cream
How to make easy homemade whipped cream
- OPTIONAL: Chill a metal mixing bowl and whisk for 10 minutes before starting (optional, and will add 10 minutes to the total time)
- Using a stand mixer or a handheld mixer, whisk heavy whipping cream for 2-3 minutes. Start on low speed and gradually increase to medium speed
- OPTIONAL: As soon as you get to medium speed, add in healthy sweeteners and flavors (I usually only add honey)
- Once soft peaks begin to form, turn whisk/mixer off and scrape the bowl.
- Whisk again on low speed until the peaks become stiff. Pay close attention to your cream at this point so you stop as soon as you get stiff peaks
- Don’t over whisk! If you do it will start to separate and begin turning into homemade butter!!
Tips & Tricks
- Decide if you want to take the extra 10 minutes to chill the bowl and whisk before you start. It’s supposed to keep it cool and help it stabilize quicker. But I don’t always do this (usually never 😉 and it turns out perfectly fine.
- Please use heavy whipping cream. You cannot use milk or half & half! It won’t work!! Look for heavy whipping cream with 36% or more milk fat. You need the extra fat for your homemade whipped cream. It helps it to stabilize and hold its light and fluffy shape
- You do not need to add any sweetener at all if you don’t want to. Just use 1 ingredient – heavy whipping cream. We love it unsweetened on pancakes and fruit.
More Tips & Tricks
- If you are sweetening with honey, add it slowly. Begin to drizzle it in while the whisk/mixer is on medium speed
- Don’t be so afraid of overmixing that you end up under mixing it. You want fairly stiff peaks so it will stabilize and stay light and fluffy longer.
- The easiest way to get the consistency of the peaks just right is to test it with a spoon. When you are seeing peaks begin to form, stop the mixer and scrape the bowl. Then scoop up some in a spoon. If it’s still runny, you need to whisk a little bit longer
- Even if you do happen to over mix it, you can try whisking in a little more whipping cream. But just whisk it again for a few seconds – be careful not to overmix it again
- If you do accidentally overmix it beyond coming back, don’t yell too loud or cry too hard (it happens to all of us!) Just jump over to the homemade whipped butter recipe – it’s pretty damn good too 😉
And then (sigh) start again with more heavy cream. The good news here is that you probably won’t overmix it next time. The bad news is that you may under mix it and it will go runny fairly soon after. The hardest part is finding those perfect stiff peaks. But once you have that, you are a whip cream pro.
Storing your homemade whipped cream
Store and refrigerate in a sealed container for up to a week. It will deflate a little in the fridge after a day or two. Just whisk it again for a few seconds. It will perk up easily.
If you want to freeze it you can. It will last up to 3 weeks in the freezer. But if you do, use it while it’s still frozen. It will destabilize and go runny when it thaws.

Homemade Whipped Cream
Equipment
- handheld mixer
Ingredients
- 1 cup heavy whipping cream
- 1 tbsp raw honey (optional)
- 1 tsp pure vanilla extract (optional)
Instructions
- (Optional) Chill mixing bowl in fridge or freezer for 10 minutes
- Using an electric mixer or whisk utensil on a stand mixer, whisk the heavy cream on low speed for 1-2 minutes.
- Gradually increase to medium speed as it begins to thicken
- When soft peaks form, turn the mixer to low speed
- Add in raw honey and vanilla (if using)
- Continue mixing on low speed just until you have stiff peaks beginning to form
- Do not overmix!!
